Blog / Service

Blog

All Service News Technology Important Information Mazda Model Features Tips Mazda Service Features & Specs Awards Mazda Vehicles Mazda Safety Technology Money Saving Tips Safety Beach Mazda Service History 2023 Models Community Events Comparisons Financing Your Mazda Fun Stuff Local 2024 Models Holidays Mazda Parts Car Buying Process Driver-Centric Design EVs Exterior Fuel & Gas Pre-Owned Certified Pre-Owned Mazda Vehicles Electric & Hybrid Vehicles Infotainment Insurance Mazda Accessories Mazda CX-30 Mazda3 Racing Restaurants & Food Tires & Wheels Travel Activities Drive For Good Kodo Design Language Mazda CX-5 Mazda CX-9 Mazda Motorsports Automotive Cleaning Fuel System Interior Paint & Body Work Seasonal Down-payments Mazda Connect Transmission Weather Brakes i-Activsense Technology Large Vehicles & SUVs Millennials Suspension System Towing
bm4 feb title

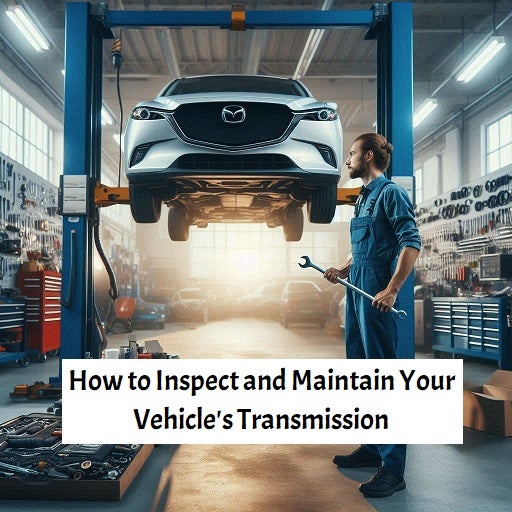
How to Inspect and Maintain Your Vehicle's Transmission

Your vehicle's transmission is one of the most critical components, responsible for transferring power from the engine to the wheels. A well-maintained transmission ensures smooth shifting and optimal performance, while neglect can lead to costly repairs or even complete transmission failure. In this blog, we’ll explore how to inspect and maintain your vehicle's transmission to keep it running smoothly for years to come. ***Please be advised, this information is for older Mazda vehicles. Newer Mazda vehicles have a sealed transmission system.*** more Understanding Your Transmission Before diving into maintenance, it's essential to understand the different types of transmissions: Automatic Transmission: Uses a complex system of gears and hydraulic systems to change gears automatically based on speed and load. Manual Transmission: Requires the driver to manually shift gears using a clutch pedal and gear lever. Continuously Variable Transmission (CVT): Uses a system of pulleys and belts to provide seamless acceleration without traditional gear shifts. Signs of Transmission Problems Regular inspection can help you identify issues before they escalate. Here are some signs that your transmission may need attention: Slipping Gears: If your transmission unexpectedly shifts out of gear or has trouble staying in gear, it could indicate a problem. Delayed Engagement: A noticeable delay when shifting from park to drive or reverse can signal low fluid levels or internal issues. Unusual Noises: Grinding, whining, or clunking sounds when changing gears can indicate worn components or low fluid. Fluid Leaks: Puddles of reddish or brownish fluid under your vehicle can indicate a transmission fluid leak, which should be addressed immediately. Regular Transmission Maintenance To keep your transmission in good shape, follow these maintenance tips: Check Transmission Fluid Level and Condition Warm Up the Vehicle: Start the engine and let it run for a few minutes to warm up the transmission fluid. Locate the Dipstick: For vehicles with an automatic transmission, locate the transmission dipstick, usually marked with a color-coded handle. Manual transmissions may not have a dipstick; instead, they may require a fill plug for checking fluid levels. Check Fluid Level: With the engine running, remove the dipstick, wipe it clean with a cloth, and reinsert it. Remove it again to check the fluid level. The fluid should be within the marked range on the dipstick. Inspect Fluid Condition: The transmission fluid should be a bright red color and free of debris. If it appears dark brown or smells burnt, it may need to be replaced. Change Transmission Fluid and Filter Most manufacturers recommend changing the transmission fluid and filter every 30,000 to 60,000 miles, but always refer to your owner’s manual for specific guidelines. Gather Supplies: You will need new transmission fluid, a new filter (if applicable), a drain pan, and a funnel. Drain the Old Fluid: Locate the transmission drain plug and remove it to let the fluid drain into the pan. Allow it to drain completely. Replace the Filter: If your vehicle has a replaceable transmission filter, remove the old filter and install the new one according to the manufacturer’s instructions. Refill with New Fluid: Use a funnel to add new transmission fluid through the dipstick tube, ensuring you use the correct type of fluid specified in your owner’s manual. Check Fluid Level Again: After refilling, start the engine and let it run for a few minutes. Check the fluid level again and add more if necessary. Inspect Transmission Cooling System An efficient transmission cooling system is vital for maintaining optimal operating temperatures: Check the Cooler Lines: Inspect the transmission cooler lines for any signs of wear, cracks, or leaks. Replace any damaged lines immediately. Inspect the Radiator: If your vehicle uses the radiator to cool the transmission fluid, ensure it is functioning properly and free of leaks. Monitor Driving Habits Your driving habits can significantly affect the lifespan of your transmission. Consider the following tips: Avoid Overloading: Excessive weight can put additional strain on your transmission. Ensure you don’t exceed the vehicle’s load capacity. Use Proper Gear: In manual transmissions, shift smoothly and at the appropriate RPMs. In automatic vehicles, avoid “lugging” the engine by letting it downshift before acceleration. Keep Your Cool: If towing or driving in heavy traffic, be mindful of your transmission temperature. Consider using an auxiliary transmission cooler for added protection. When to Seek Professional Help While many transmission maintenance tasks can be performed at home, some issues may require professional attention. If you notice persistent problems, such as slipping, delayed engagement, or unusual noises, it's best to consult a qualified mechanic. They can diagnose and repair any internal issues that may be affecting your transmission. Ensuring Longevity and Performance Regular inspection and maintenance of your vehicle's transmission are essential for ensuring its longevity and performance. By checking fluid levels, changing fluid and filters, inspecting the cooling system, and being mindful of your driving habits, you can keep your transmission running smoothly. If you’re ever in doubt or encounter significant issues, don’t hesitate to seek professional assistance. Taking proactive steps will help you avoid costly repairs and keep your vehicle on the road for years to come.

bf2 jan title

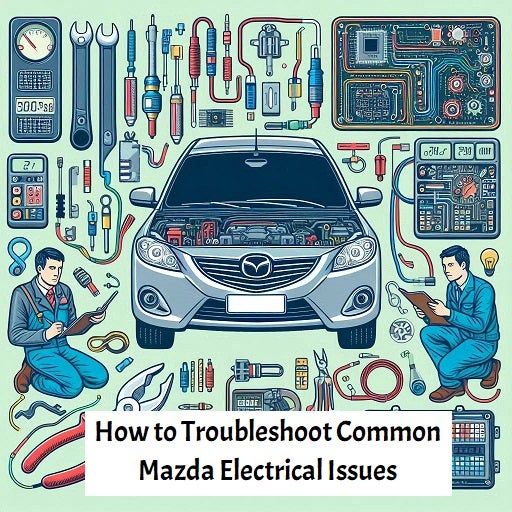
How to Troubleshoot Common Mazda Electrical Issues

Electrical issues can be frustrating for any car owner, and Mazda vehicles, like all modern cars, rely heavily on electrical systems for performance and safety. From starting problems to malfunctioning lights, understanding how to troubleshoot common electrical issues can save you time and money. In this blog, we’ll explore some common electrical problems encountered in Mazda vehicles and provide you with practical troubleshooting steps to help you diagnose and resolve them. more Symptoms of Electrical Issues Before diving into troubleshooting, it’s essential to recognize the symptoms of electrical issues. Common signs include: Vehicle Won't Start: The engine cranks but doesn’t start, or there are no sounds at all when you turn the key. Dim or Flickering Lights: Interior or exterior lights are dim, flickering, or completely non-functional. Warning Lights on Dashboard: Various warning lights appear on the dashboard, indicating potential electrical issues. Malfunctioning Accessories: Power windows, locks, or other electrical accessories fail to operate correctly. Battery Drain: Frequent dead batteries or slow cranking when starting the engine. Troubleshooting Steps If you encounter any of the above symptoms, follow these troubleshooting steps to diagnose the issue. Step 1: Check the Battery Visual Inspection: Start by checking the battery for any signs of corrosion around the terminals. Clean any corrosion with a mixture of baking soda and water, and ensure the terminals are tightly connected. Battery Voltage: Use a multimeter to measure the battery voltage. A fully charged battery should read around 12.6 volts. If the voltage is significantly lower, consider charging or replacing the battery. Step 2: Inspect Fuses Locate the Fuse Box: Find the fuse box in your Mazda, typically located under the dashboard or in the engine compartment. Check for Blown Fuses: Visually inspect the fuses for any that appear burnt out. If you find a blown fuse, replace it with one of the same amperage. Identify the Issue: If the new fuse blows shortly after replacement, it may indicate an underlying electrical problem, such as a short circuit. Step 3: Examine the Alternator Testing the Alternator: Start the engine and use a multimeter to measure the voltage at the battery terminals. The reading should be between 13.7 to 14.7 volts if the alternator is functioning properly. Listen for Unusual Noises: While the engine is running, listen for any strange noises coming from the alternator, such as grinding or whining, which could indicate a failing alternator. Step 4: Check Wiring and Connections Inspect Wiring Harnesses: Look for damaged or frayed wiring in the engine compartment and under the dashboard. Pay close attention to areas that may be exposed to heat or abrasion. Check Ground Connections: Ensure that all ground connections are clean and secure. A loose or corroded ground connection can lead to various electrical issues. Step 5: Test Electrical Components Use a Multimeter: Test individual electrical components, such as power windows, lights, and switches, with a multimeter to check for proper voltage and functionality. Swap Components: If a specific accessory is malfunctioning, consider swapping it with a known good component (if applicable) to determine if the issue lies with the component itself. Common Electrical Issues and Solutions Here are a few common electrical issues encountered in Mazda vehicles and their potential solutions: Problem: Power Windows Won't Operate Solution: Check the window fuse and switch. If the fuse is intact, test the switch and window motor with a multimeter to identify any faulty components. Problem: Dashboard Warning Lights Stay On Solution: Use an OBD-II scanner to read diagnostic trouble codes (DTCs). This can help pinpoint the specific issue triggering the warning lights. Problem: Headlights or Taillights Are Dim Solution: Inspect the bulbs for wear and replace them if necessary. Check the wiring and connections to ensure there are no loose or corroded terminals. Problem: Battery Drains Overnight Solution: Perform a parasitic draw test using a multimeter to identify any components that may be drawing excessive power when the vehicle is off. When to Seek Professional Help While many electrical issues can be diagnosed and resolved with basic troubleshooting, some problems may require professional assistance. If you encounter persistent issues, complex wiring problems, or are unsure about performing electrical repairs, it’s best to consult a qualified mechanic. They have the tools and expertise to diagnose and fix more intricate electrical problems safely. Save Time, Monday and Frustration Troubleshooting common electrical issues in your Mazda can save you time, money, and frustration. By following these steps and being proactive about maintenance, you can ensure your vehicle’s electrical system remains in good working order. Remember that safety is paramount; if you ever feel unsure about your ability to diagnose or repair electrical problems, don’t hesitate to seek professional assistance. With a little knowledge and care, you can keep your Mazda running smoothly and enjoy a hassle-free driving experience.

bm1 jan title

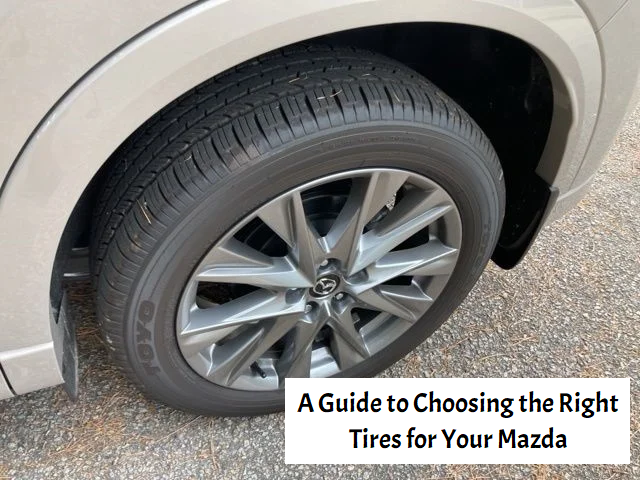
A Guide to Choosing the Right Tires for Your Mazda

Your Mazda is designed for performance, safety, and comfort, and the right set of tires plays a crucial role in maintaining these qualities. Whether you're looking to replace your worn-out tires or upgrade to a new set, choosing the right tires is essential for optimizing your Mazda's handling, fuel efficiency, and overall driving experience. This guide will walk you through the key factors to consider when selecting tires for your Mazda. more Understanding Tire Basics: What You Need to Know Before diving into the selection process, it's important to understand the basics of tire specifications and how they impact your driving experience. Tire Size: The size of your tires is specified by a combination of numbers and letters, such as 225/45R17. These numbers represent the tire's width, aspect ratio, and diameter. It's crucial to choose tires that match the size recommended by Mazda for your specific model, as using the wrong size can affect handling, safety, and even your vehicle's warranty. Tread Pattern: Tires come with different tread patterns designed for various driving conditions. The tread pattern affects traction, handling, and noise levels. Common tread patterns include: Symmetrical: Offers a smooth, quiet ride and long-lasting performance. Ideal for everyday driving. Asymmetrical: Combines different tread patterns to enhance handling, especially in wet conditions. Great for sporty driving. Directional: Designed for high-performance driving with excellent wet and dry traction. Often found on sports cars and performance vehicles. Speed Rating: The speed rating indicates the maximum speed at which a tire can safely operate. It's denoted by a letter, such as H, V, or Z. Make sure to choose a tire with a speed rating that meets or exceeds the capabilities of your Mazda. Load Index: The load index indicates the maximum weight a tire can support. It's important to select tires with a load index that matches or exceeds the weight of your Mazda, especially if you frequently carry heavy loads or passengers. Types of Tires: Which One Is Right for Your Mazda? Different types of tires are designed to perform optimally in specific conditions. Choosing the right type of tire depends on your driving habits, the climate you live in, and your Mazda model. All-Season Tires: All-season tires are the most versatile option, designed to perform well in a variety of conditions, including dry, wet, and light snow. They offer a balance of comfort, durability, and performance, making them an excellent choice for most Mazda drivers. If you live in an area with mild winters and don't frequently encounter extreme weather conditions, all-season tires are likely the best choice for you. Summer Tires: Summer tires, also known as performance tires, are engineered for maximum grip and handling on dry and wet roads during warm weather. They offer superior traction and responsiveness, making them ideal for sporty driving and high-performance Mazda models like the Mazda MX-5 Miata. However, summer tires are not suitable for cold weather or snow-covered roads, so they should be used only during the warmer months. Winter Tires: Winter tires are specifically designed to provide optimal traction and handling in cold weather, snow, and ice. They feature a softer rubber compound that remains flexible in low temperatures and a tread pattern designed to bite into snow and ice. If you live in an area with harsh winters, winter tires are essential for maintaining safety and control. It's recommended to switch to winter tires when the temperature consistently drops below 45°F (7°C). Touring Tires: Touring tires are designed for a smooth, comfortable ride with enhanced fuel efficiency and longer tread life. They are ideal for drivers who prioritize comfort and economy over sporty performance. Touring tires are a great option for Mazda sedans and crossovers used primarily for commuting and long-distance driving. Performance Tires: Performance tires are designed for drivers who demand high levels of grip, handling, and responsiveness. They are often found on sports cars and performance-oriented Mazda models. While they offer excellent performance in dry and wet conditions, they may have a shorter tread life and be noisier than other tire types. Off-Road Tires: If you frequently take your Mazda CX-5 or CX-9 off the beaten path, off-road or all-terrain tires may be a good choice. These tires are designed with rugged tread patterns and reinforced sidewalls to handle rough terrain, mud, and gravel. However, they may sacrifice some comfort and fuel efficiency on paved roads. Considering Your Driving Habits: Tailoring Your Tire Choice Your driving habits play a significant role in determining the right tires for your Mazda. Consider the following factors when making your decision: Daily Commutes: If you use your Mazda primarily for daily commuting on highways and city streets, all-season or touring tires are likely the best option. They offer a good balance of comfort, fuel efficiency, and durability. Sporty Driving: For those who enjoy spirited driving or own a performance-oriented Mazda model like the MX-5 Miata, performance or summer tires will provide the grip and handling needed to fully enjoy the driving experience. Long-Distance Travel: If you frequently embark on long road trips, touring tires may be the best choice for their smooth ride and long tread life. They are designed to minimize road noise and enhance comfort, making them ideal for extended journeys. Off-Road Adventures: If you often take your Mazda on off-road trails or unpaved roads, consider all-terrain or off-road tires. These tires are built to handle rough surfaces and provide the necessary traction for off-road driving. Winter Conditions: If you live in an area with harsh winters, winter tires are a must. They provide the traction and control needed to navigate snow and ice safely. Remember to switch back to all-season or summer tires when the weather warms up to maintain optimal performance. Budget Considerations: Balancing Cost and Quality Tires are a significant investment in your Mazda's performance and safety, so it's important to balance cost with quality. Here are some tips for making a budget-conscious decision: Set a Budget: Determine how much you're willing to spend on tires before you start shopping. While it's important to stay within your budget, remember that tires are a critical component of your vehicle's safety and performance, so prioritize quality. Compare Brands: There are many reputable tire brands available, each offering a range of options at different price points. Research and compare brands to find a set of tires that offers the best value for your needs. Well-known brands like Michelin, Bridgestone, Goodyear, and Continental are often reliable choices. Consider Tread Life: Tires with longer tread life may have a higher upfront cost but can save you money in the long run by lasting longer. Check the treadwear rating to get an idea of how long the tires are expected to last. Look for Promotions: Tire manufacturers and retailers often run promotions, discounts, or rebates. Keep an eye out for these deals to save money on your purchase. Balance Performance and Price: While high-performance tires may be tempting, consider whether you truly need the extra capabilities they offer. For everyday driving, a good-quality all-season tire may provide all the performance you need at a lower cost. Maintaining Your Tires: Maximizing Longevity and Performance Once you've chosen the right tires for your Mazda, proper maintenance is key to maximizing their lifespan and performance. Here are some maintenance tips to keep your tires in top condition: Regularly Check Tire Pressure: Maintaining the correct tire pressure is crucial for safety, fuel efficiency, and tire longevity. Check your tire pressure at least once a month and before long trips. Refer to your Mazda's owner’s manual or the sticker inside the driver’s door for the recommended pressure levels. Rotate Tires: To ensure even wear, have your tires rotated every 6,000 to 8,000 miles, or as recommended by Mazda. Rotating your tires helps extend their lifespan and maintain consistent handling. Align and Balance Tires: If you notice uneven tire wear, your Mazda may need a wheel alignment or balancing. Proper alignment and balancing ensure that your tires wear evenly and that your vehicle handles correctly. Check Tread Depth: Worn-out tires with low tread depth can compromise traction and safety, especially in wet conditions. Use the penny test to check your tread depth: insert a penny into the tread with Lincoln's head facing down. If you can see the top of Lincoln’s head, it's time to replace your tires. Inspect for Damage: Regularly inspect your tires for signs of damage, such as cuts, punctures, or bulges. If you notice any damage, have your tires inspected by a professional to determine if they need to be repaired or replaced. Essential Maintenance Choosing the right tires for your Mazda is an essential part of maintaining your vehicle's performance, safety, and comfort. By understanding tire basics, considering your driving habits, and balancing cost with quality, you can select a set of tires that will keep your Mazda performing at its best. Remember to maintain your tires properly to maximize their lifespan and ensure a smooth, safe driving experience. Whether you're cruising through the city, taking a road trip, or navigating winter weather, the right tires will help you enjoy every mile in your Mazda.

rtjtryktyktyj

Driving Confidence: Top 5 Reasons to Choose Dealership Service for Your Car Repairs

When it comes to keeping your vehicle in peak condition, choosing where to have it serviced is a crucial decision. While independent garages and quick-service centers are common options, there are compelling reasons to consider having your car repaired or serviced at a dealership. In this blog post, we'll explore the top five reasons why dealership service might be the best choice for ensuring the longevity and optimal performance of your vehicle. more Manufacturer Expertise Dealership service centers specialize in the brands they sell. This means that the technicians working on your vehicle have in-depth knowledge of the manufacturer's specifications, engineering, and technology. Their training often includes direct access to manufacturer resources, ensuring your car is serviced with the latest information and techniques. Genuine Parts and Accessories When you choose dealership service, you can be confident that your vehicle will receive genuine manufacturer parts and accessories. These components are designed and tested to meet the exact specifications of your car. Using original parts helps maintain the integrity of your vehicle, ensuring optimal performance, safety, and longevity. Advanced Diagnostics and Equipment Dealership service centers are equipped with state-of-the-art diagnostic tools and equipment. This advanced technology allows technicians to pinpoint issues accurately and efficiently. Whether it's identifying a complex engine problem or diagnosing a modern vehicle's intricate electronic systems, dealership service centers are well-equipped to handle the latest automotive advancements. Recall Information and Updates Dealerships are the first to receive information about recalls and service updates from the manufacturer. When you service your car at a dealership, you benefit from their direct access to this critical information. This ensures that your vehicle receives necessary updates, addressing potential safety concerns or performance enhancements as recommended by the manufacturer. Warranty Coverage If your vehicle is still under warranty, having it serviced at a dealership is often a requirement to maintain warranty coverage. Manufacturers typically outline specific service requirements to validate warranty claims. By following these guidelines and having your car serviced at an authorized dealership, you can ensure that any warranty-related issues are addressed promptly and without additional costs. Additional Considerations Customer Amenities: Dealership service centers often provide comfortable waiting areas with amenities such as Wi-Fi, refreshments, and sometimes even shuttle services. This adds to the overall customer experience during the service process. Trained Technicians: Dealership technicians undergo extensive training to stay updated on the latest technologies and repair techniques. This ensures that they can effectively address issues specific to your vehicle model. Service Records: Maintaining a consistent service record at a dealership can enhance the resale value of your vehicle. Prospective buyers often view dealership service records as a sign of proper maintenance and care. Several Advantages Choosing to have your car serviced at a dealership offers several advantages, from manufacturer expertise to access to genuine parts and advanced diagnostics. While independent garages and quick-service centers have their merits, the specialized knowledge and resources available at dealership service centers can provide peace of mind and contribute to the long-term health of your vehicle. Consider these reasons when deciding where to entrust your car for repairs and maintenance, and drive with confidence knowing your vehicle is in expert hands.

bm2 dec title

Navigating the Road to Savings: Tips for Finding an Affordable Automotive Repair Shop

Every car owner knows that the open road is not always smooth, and sooner or later, the need for automotive repairs is bound to arise. However, finding a reliable and affordable automotive repair shop can sometimes feel like navigating an unfamiliar route. In this blog, we'll explore practical tips and strategies to help you find an affordable automotive repair shop that not only fits your budget but also provides quality service. more R esearch and Recommendations Start your quest for an affordable automotive repair shop by conducting thorough research. Seek recommendations from friends, family, and colleagues who have had positive experiences with budget-friendly shops. Online reviews and forums can also offer valuable insights into the reputation and pricing of local repair shops. Compare Quotes Don't settle for the first quote you receive. Reach out to multiple automotive repair shops in your area and request detailed quotes for the specific services your vehicle needs. A transparent and itemized quote will help you understand the cost breakdown and make an informed decision. C heck Certifications and Experience While affordability is essential, it's equally crucial to ensure that the repair shop has certified technicians and relevant experience. Look for certifications displayed in the shop, as they indicate a commitment to professional standards. Experienced technicians are more likely to diagnose issues accurately, potentially saving you money in the long run. L ook for Special Offers and Discounts Many automotive repair shops offer special promotions, discounts, or loyalty programs. Keep an eye out for these cost-saving opportunities, as they can significantly reduce the overall expense of your repairs. Some shops may also have seasonal promotions or discounts for new customers. Consider Local and Independent Shops Local and independent automotive repair shops often have lower overhead costs compared to large chains, making their services more budget-friendly. Additionally, local shops are more likely to prioritize customer satisfaction, as their reputation within the community is at stake. Ask about Warranty and Guarantees A reputable and affordable automotive repair shop should stand by the quality of its work. Inquire about warranties or guarantees on parts and labor. This not only reflects the shop's confidence in its services but also provides you with added peace of mind, knowing that you won't incur additional costs if an issue arises shortly after the repair. DIY Options and Maintenance Workshops For smaller repairs and routine maintenance tasks, consider exploring do-it-yourself (DIY) options. Many automotive parts stores offer workshops or tutorials on basic maintenance tasks, allowing you to save money by handling simpler repairs on your own. Build a Relationship Establishing a long-term relationship with an automotive repair shop can lead to benefits such as loyalty discounts and personalized service. By consistently choosing the same shop for your repairs, you may find that they are more willing to work with you on pricing. Affordability and Quality Finding an affordable automotive repair shop is not just about cutting costs; it's about striking a balance between affordability and quality service. By following these tips, you can navigate the road to savings and ensure that your vehicle receives the care it needs without breaking the bank. Remember, a reliable and budget-friendly repair shop can be a valuable asset on your journey as a car owner.

bm2 nov title

Smooth Shifts: How Often You Should Change Your Transmission Fluid

Your vehicle's transmission is a critical component that ensures the smooth operation of gears, allowing for efficient power transfer from the engine to the wheels. One key factor in maintaining a healthy transmission is regular fluid changes. In this blog post, we'll explore the importance of transmission fluid, signs that it may need changing, and the recommended frequency for this crucial maintenance task. more The Role of Transmission Fluid Transmission fluid serves multiple essential functions in your vehicle's transmission system: Lubrication: Transmission fluid lubricates the various moving parts within the transmission, reducing friction and preventing wear and tear. Cooling: It helps dissipate heat generated during the operation of the transmission, preventing overheating and potential damage. Seal Conditioning: Transmission fluid conditions and maintains the integrity of seals, preventing leaks and ensuring a tight seal on various components. Signs Your Transmission Fluid Needs Changing While there is a recommended schedule for changing transmission fluid, it's crucial to pay attention to your vehicle's specific needs. Signs that your transmission fluid may need changing include: Discolored Fluid: Transmission fluid is typically a bright red color. If it appears brown or has a burnt smell, it may be time for a change. Slipping Gears: If you experience a delay or slipping sensation when shifting gears, it could indicate insufficient or degraded transmission fluid. Unusual Noises: Whining or clunking noises during gear shifts may be a sign of inadequate lubrication, often due to deteriorating transmission fluid. Overheating: An overheating transmission can lead to fluid breakdown. If you notice your transmission temperature rising, it's crucial to address the issue promptly. Recommended Frequency for Transmission Fluid Changes The recommended frequency for changing transmission fluid can vary depending on the make and model of your vehicle. However, a general guideline is to change the transmission fluid every 30,000 to 60,000 miles (48,000 to 96,000 kilometers). Normal Driving Conditions: For vehicles that undergo regular, everyday driving without extreme conditions, the 30,000 to 60,000-mile range is a suitable guideline. Severe Driving Conditions: If you often engage in severe driving conditions, such as towing heavy loads, driving in stop-and-go traffic, or frequent short trips, consider changing the transmission fluid more frequently—closer to the 30,000-mile mark. DIY or Professional Service Changing transmission fluid can be a DIY task for some, but it may require specialized tools and expertise. If you're comfortable performing automotive maintenance tasks and your vehicle's design allows for easy access to the transmission fluid, you might consider tackling this job yourself. However, if you're unsure or prefer professional assistance, a certified mechanic or service center can ensure the task is done correctly. Vital Maintenance Regular transmission fluid changes are vital for maintaining the health and longevity of your vehicle's transmission system. By adhering to the recommended frequency and staying vigilant for signs of fluid degradation, you can enjoy smoother shifts, prevent costly repairs, and extend the life of your transmission. Whether you choose to perform the task yourself or seek professional help, prioritizing transmission fluid changes is a key aspect of responsible vehicle ownership.

bm1 nov title

Clearing the Air: 6 Common Questions and Answers About Windshield Replacements

Your car's windshield is not just a protective barrier against the elements; it's a crucial component of your vehicle's structural integrity and safety features. When faced with windshield damage, understanding the essentials of windshield replacement is essential. In this blog, we'll address six common questions about windshield replacements to guide you through the process. more Q: Can a Cracked Windshield Be Repaired, or Does It Need Replacement? A: In some cases, minor chips or cracks can be repaired using specialized techniques. However, if the damage is extensive, located in the driver's line of sight, or compromises the structural integrity of the windshield, replacement is often the safer and more effective option. Consulting with a professional technician can help determine the best course of action for your specific situation. Q: How Long Does a Windshield Replacement Take? A: The duration of a windshield replacement depends on various factors, including the complexity of the installation and the type of adhesive used. On average, the process can take anywhere from 1 to 2 hours. It's advisable to check with the auto glass service provider for a more accurate estimate based on your vehicle's make and model. Q: Will Insurance Cover the Cost of a Windshield Replacement? A: Many insurance policies cover windshield replacements, and some even offer full coverage without imposing a deductible. Check your insurance policy to understand your coverage. If covered, the replacement cost is often taken care of by the insurance company, making it a cost-effective solution. Q: Can I Drive Immediately After a Windshield Replacement? A: While the adhesive used during the replacement process cures relatively quickly, it's recommended to wait until it fully sets before driving. This typically takes about 1 to 2 hours. Your technician will provide specific instructions, and it's crucial to follow them to ensure the windshield is secure and safe for driving. Q: What Type of Glass is Used for Windshield Replacements? A: Windshields are typically made of laminated safety glass, which consists of two layers of glass with a layer of polyvinyl butyral (PVB) in between. This design enhances safety by preventing the glass from shattering upon impact. When getting a replacement, it's essential to use glass that meets or exceeds original equipment manufacturer (OEM) standards to ensure proper fit and performance. Q: How Do I Care for a Newly Replaced Windshield? A: After a windshield replacement, avoid washing your car or exposing it to rain for at least 24 hours, allowing the adhesive to fully cure. Additionally: Do not slam car doors forcefully, as the increased pressure may affect the seal. Avoid off-road or high-impact driving immediately after replacement. Wait for a few days before using automated car washes to prevent damage to the fresh seal. A Common Necessity: Windshield replacements are a common necessity, whether due to chips, cracks, or extensive damage. Understanding the process, insurance coverage, and post-replacement care is crucial for a successful and safe windshield replacement. If you encounter windshield damage, seeking professional advice and timely replacement can help maintain the structural integrity of your vehicle and ensure a clear and safe view of the road ahead.

bm4 oct title

Listen Up: Top 3 Car Engine Noises That Demand Immediate Attention

Your car is like a symphony of moving parts, each contributing to the harmonious hum of a well-functioning engine. However, just like any orchestra, when one instrument is out of tune, the entire performance is affected. In the case of your car, unusual engine noises can be the early warning signs of potential issues that demand your immediate attention. In this blog post, we'll explore the top three car engine noises that should never be ignored. more Knocking or Pinging Sounds A distinct knocking or pinging noise coming from your engine can be an alarming sign of a problem with the combustion process. This noise is often caused by premature ignition of the air-fuel mixture in the cylinders, resulting in a knocking sound. Ignoring this issue can lead to serious damage to the engine. Possible Causes: Low-quality or incorrect fuel: Use the recommended fuel grade for your vehicle. Carbon buildup in the combustion chamber: Regular maintenance and fuel system cleaning can help prevent this issue. Faulty spark plugs or ignition timing: Replace spark plugs and ensure proper ignition timing during routine maintenance. Immediate Action: If you notice persistent knocking or pinging sounds, it's crucial to consult a professional mechanic promptly. Ignoring this issue can lead to piston damage, engine overheating, and decreased fuel efficiency. Squealing or Screeching Noises A high-pitched squealing or screeching noise when you start your car or while driving can indicate a problem with the belt system. Belts play a crucial role in powering various engine components, such as the alternator, water pump, and air conditioning compressor. Ignoring these noises may result in a sudden breakdown or even engine damage. Possible Causes: Worn or loose serpentine belt: Belts wear out over time and may need replacement. Faulty tensioner or pulley: A malfunctioning tensioner or pulley can lead to belt slippage and noise. Contaminated or damaged belt: Oil or coolant leaks can damage belts, causing noise. Immediate Action: Inspect the belt system visually for any signs of wear, damage, or misalignment. If you notice issues, consult a mechanic to replace the damaged components promptly. Ignoring belt issues can lead to a breakdown or a more expensive repair. Rattling or Ticking Sounds A consistent rattling or ticking noise from the engine can be an indication of a serious problem, such as issues with the timing chain or valve train. These components play a crucial role in controlling the timing and movement of engine parts, and any abnormalities can lead to significant damage. Possible Causes: Worn or damaged timing chain: A loose or damaged timing chain can result in engine misfires and decreased performance. Low oil levels or poor oil quality: Proper lubrication is essential for the smooth operation of engine components. Valve train issues: Damaged lifters, valves, or other valve train components can cause ticking sounds. Immediate Action: If you hear persistent rattling or ticking sounds, do not delay seeking professional assistance. These noises can be indicative of serious internal engine problems that, if left unaddressed, may lead to catastrophic engine failure. Be Attentive Your car's engine communicates with you through various sounds, and being attentive to these cues can help you catch potential issues before they escalate. If you notice any of the aforementioned noises, don't hesitate to consult a qualified mechanic. Regular maintenance, prompt attention to unusual sounds, and addressing issues early on can help keep your car's engine running smoothly and extend its lifespan. Remember, when it comes to your car's health, listening can be just as important as looking under the hood.

bm2 oct title

Navigating Winter Roads: Unraveling the Differences Between Winter Tires and All-Season Tires

As winter blankets the roads with snow and ice, your vehicle's safety relies heavily on the type of tires it wears. When it comes to choosing the right tires for winter driving, the debate often centers around two main contenders: winter tires and all-season tires. In this blog post, we'll dive into the key differences between these two tire types, helping you make an informed decision for safer winter travels. more Tread Design and Compound Winter Tires: Winter tires are specifically engineered to tackle cold and icy conditions. They feature a unique tread design with deeper grooves and a higher number of sipes (small channels) to enhance grip on slippery surfaces. The rubber compound used in winter tires remains flexible in low temperatures, providing better traction and grip in freezing conditions. All-Season Tires: All-season tires, as the name suggests, aim to provide a balanced performance in various weather conditions, including mild winter conditions. They come with a tread design that strikes a compromise between dry and wet traction. However, the rubber compound used in all-season tires may harden in extremely cold temperatures, leading to reduced flexibility and traction. Performance in Snow and Ice Winter Tires: Winter tires excel in snow and ice. The aggressive tread patterns and softer rubber compounds allow them to bite into snow and ice, providing superior traction and handling. The tread is designed to evacuate snow and slush efficiently, reducing the risk of skidding. All-Season Tires: While all-season tires offer better performance in winter compared to summer tires, they may struggle in extreme winter conditions. The tread patterns are not as aggressive, and the rubber compound is not as pliable in very cold temperatures, compromising their performance on snow and ice. Temperature Sensitivity Winter Tires: Winter tires are designed for cold weather, and their rubber compounds remain flexible even in freezing temperatures. This ensures optimal traction and handling in winter conditions. However, their performance may degrade in warmer temperatures, making them less suitable for year-round use. All-Season Tires: All-season tires are built to provide decent performance in a variety of conditions, including mild winter weather. They are a good compromise for drivers who do not face extreme winter conditions regularly. However, in very cold temperatures, their rubber may stiffen, affecting traction. Know the Difference Choosing between winter tires and all-season tires ultimately depends on your local climate and driving habits. If you frequently encounter harsh winter conditions with snow and ice, investing in a set of winter tires is a wise decision for enhanced safety and performance. On the other hand, if your winters are milder and you want a tire that can handle a variety of conditions throughout the year, all-season tires may be a more practical choice. Remember, the right tires can make a significant difference in your vehicle's handling and your safety on winter roads.

bm4-sept-title

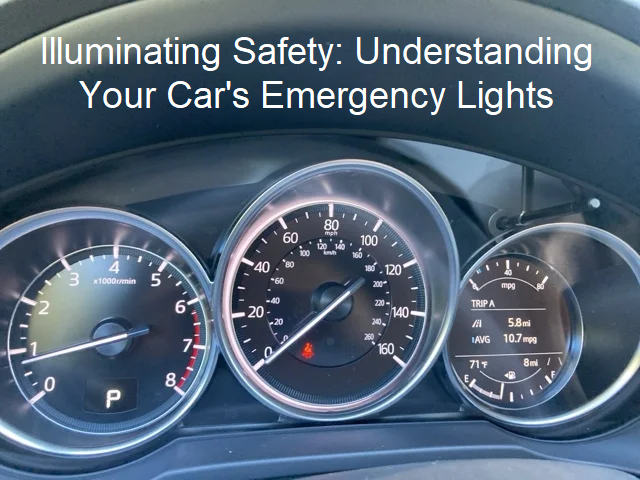
Illuminating Safety: Understanding Your Car's Emergency Lights

Your car's emergency lights are like silent guardians, ready to communicate crucial information to other drivers and pedestrians on the road. In this blog post, we'll delve into the different types of emergency lights in your vehicle, their functions, and when and how to use them effectively. more Hazard Lights (Flashers) Function: Hazard lights, commonly known as flashers, are designed to alert others to a potential road hazard or emergency. When to Use: Use hazard lights when your vehicle is stationary and facing an emergency situation, such as a breakdown, flat tire, or when parked in a hazardous location. Pro Tip: It's important to use hazard lights only when your vehicle is stationary. Activating them while driving can confuse other motorists and may be illegal in some areas. Turn Signals Function: Turn signals, or indicators, communicate your intention to turn or change lanes to other drivers. When to Use: Activate turn signals well in advance of making a turn or changing lanes. This gives other drivers ample time to anticipate your movements. Pro Tip: Always check that your turn signals are functioning properly during routine vehicle checks. Emergency Brake Lights Function: Some vehicles are equipped with emergency brake lights that illuminate more brightly when the driver applies the brakes forcefully. When to Use: Emergency brake lights activate during sudden and hard braking, signaling to following drivers that you are making a sudden stop. Pro Tip: Familiarize yourself with your vehicle's braking system, and use emergency brake lights judiciously to communicate urgency. Emergency Flashers in Motion Function: In some situations, flashing your headlights while driving can signal an emergency or a need for assistance. When to Use: Use this feature sparingly and only in situations where immediate attention is required, such as a medical emergency or when signaling for help. Pro Tip: Be aware that in some regions, flashing headlights while driving may be subject to legal restrictions. Fog Lights Function: Fog lights are designed to improve visibility in adverse weather conditions, such as dense fog or heavy rain. When to Use: Turn on fog lights when driving in foggy conditions, heavy rain, or when visibility is significantly reduced. Pro Tip: Avoid using fog lights in clear conditions, as they can be blinding to other drivers. Understanding Dashboard Warning Lights Function: Modern vehicles are equipped with various warning lights on the dashboard that signal specific issues, such as engine trouble, low tire pressure, or low fuel. When to Take Action: Respond promptly to dashboard warning lights by consulting your vehicle's manual or seeking professional assistance. Ignoring warning lights can lead to more significant problems. Vital Communication Your car's emergency lights are vital communication tools that enhance road safety and facilitate smooth traffic flow. Understanding when and how to use these lights ensures that you can navigate emergency situations effectively and convey important information to fellow drivers. Regularly check your vehicle's lighting systems to ensure they are functioning correctly, and always adhere to local traffic laws regarding the use of emergency lights. By doing so, you contribute to a safer and more cooperative driving environment for everyone on the road.

bm3-aug-title

Keeping Your Cool: A Comprehensive Guide to Maintaining Your Vehicle's Cooling System

Your vehicle's cooling system plays a vital role in preventing overheating and ensuring optimal engine performance. Regular maintenance of the cooling system is essential for the longevity of your vehicle and preventing costly repairs. In this blog, we'll provide a comprehensive guide on how to maintain your vehicle's cooling system, keeping your engine running smoothly and your car on the road. more Understanding the Cooling System The cooling system consists of various components working together to regulate engine temperature and prevent overheating. Key components include the radiator, coolant, water pump, thermostat, and hoses. Proper maintenance of these components is crucial for the efficient operation of the cooling system. 1. Regularly Check Coolant Levels Why It's Important: Coolant, also known as antifreeze, helps regulate the engine temperature and prevents freezing in cold conditions. Regularly check coolant levels to ensure they are within the recommended range. Tip: Check coolant levels when the engine is cool, and if needed, top up with a mixture of coolant and distilled water as specified in your vehicle's owner's manual. 2. Inspect for Coolant Leaks Why It's Important: Coolant leaks can lead to a loss of fluid, causing the engine to overheat. Periodically inspect the area around the radiator, hoses, and water pump for signs of leaks. Tip: Look for puddles or stains beneath the vehicle and check for visible leaks in the engine compartment. 3. Flush and Replace Coolant Why It's Important: Over time, coolant can accumulate contaminants and lose its effectiveness. A periodic coolant flush helps remove debris and old fluid, ensuring optimal performance. Tip: Follow your vehicle manufacturer's recommended interval for coolant replacement. Use the type of coolant specified in your owner's manual. 4. Check Radiator and Cooling Fins Why It's Important: The radiator dissipates heat from the coolant, and the cooling fins enhance this process. Inspect the radiator for damage and ensure the fins are clean and free from debris. Tip: Use a soft brush or compressed air to clean the cooling fins and visually inspect for any bent or damaged sections. 5. Inspect Belts and Hoses Why It's Important: Belts and hoses play a crucial role in the cooling system. Regularly inspect them for signs of wear, cracking, or leaks to prevent unexpected failures. Tip: Replace worn or damaged belts and hoses promptly. Check for proper tension in the belts to ensure they are functioning correctly. 6. Test the Thermostat Why It's Important: The thermostat regulates coolant flow, ensuring it reaches the proper temperature. Testing the thermostat helps identify any issues with its operation. Tip: If you notice fluctuations in engine temperature or overheating, it may indicate a faulty thermostat. Consider having it tested or replaced. 7. Monitor the Water Pump Why It's Important: The water pump circulates coolant through the engine and radiator. Regularly check for leaks around the water pump and listen for any unusual noises. Tip: If you notice coolant leaks or hear a squeaking noise, it may indicate a failing water pump. Address these issues promptly to prevent overheating. 8. Keep an Eye on Engine Temperature Why It's Important: Monitoring your vehicle's temperature gauge can provide early indications of cooling system issues. An unusually high temperature may signal a problem. Tip: If you observe temperature fluctuations or overheating, consult a professional mechanic to diagnose and address the issue. 9. Use Coolant Additives Why It's Important: Coolant additives can enhance the performance of your vehicle's cooling system. They can provide additional protection against rust, corrosion, and the formation of deposits. Tip: Follow the manufacturer's recommendations when using coolant additives and choose products compatible with your vehicle's coolant. 10. Consult a Professional Mechanic Why It's Important: While you can perform basic cooling system maintenance, consulting a professional mechanic for more complex tasks and inspections ensures thorough care for your vehicle. Tip: Schedule regular check-ups with a mechanic to assess the overall health of your vehicle's cooling system and address any potential issues. Responsible Car Ownership Maintaining your vehicle's cooling system is a crucial aspect of responsible car ownership. By following these comprehensive steps and staying proactive with regular checks, you can prevent overheating, extend the life of your engine, and ensure a smooth and reliable driving experience. Remember that a well-maintained cooling system not only keeps your engine cool but also contributes to the overall health and longevity of your vehicle.

bm1-title-pic

Ready, Set, Road Trip: A Comprehensive Guide to Getting Your Vehicle Adventure-Ready

Embarking on a road trip is an exhilarating experience, and ensuring your vehicle is in top-notch condition is crucial for a smooth and enjoyable journey. Before you hit the open road, it's essential to prepare your car for the adventure ahead. In this blog post, we'll provide a comprehensive guide to getting your vehicle road trip ready. more Perform a Thorough Inspection Before anything else, conduct a comprehensive inspection of your vehicle. Check the following: Fluid Levels: Ensure that engine oil, transmission fluid, brake fluid, coolant, and windshield washer fluid levels are appropriate. Tire Condition: Inspect tire tread depth, look for signs of uneven wear, and ensure all tires are properly inflated, including the spare. Brakes: Check the brake pads and rotors for wear. If you hear unusual noises or experience braking issues, have the brakes inspected. Lights and Signals: Verify that all lights, including headlights, brake lights, turn signals, and hazard lights, are functioning correctly. Battery: Test the battery's charge and inspect for any signs of corrosion on the terminals. Change the Oil and Filter Schedule an oil change if you're due for one. Fresh oil and a clean filter help ensure optimal engine performance during the road trip. Check the manufacturer's recommendations for the appropriate oil type and change interval. Check the Cooling System A well-functioning cooling system is vital for preventing overheating during long drives. Inspect the radiator, hoses, and coolant levels. If the coolant hasn't been changed in a while, consider flushing and refilling the system. Inspect the Brakes Brakes are crucial for safety, especially on long journeys. If you notice any signs of brake issues, such as squeaking or grinding noises, or if it's been a while since your last brake inspection, schedule a checkup. Replace brake pads or rotors as needed. Replace Wiper Blades and Fluid Clear visibility is essential for safe driving. Replace worn-out wiper blades and ensure the windshield washer fluid reservoir is filled. Summer road trips may involve unexpected rain showers, and having efficient wipers is crucial. Test the Air Conditioning A functional air conditioning system ensures a comfortable driving experience, especially during hot summer months. Test the AC system to ensure it's cooling effectively. If there are issues, schedule a professional inspection and recharge if necessary. Inspect the Suspension and Alignment A smooth ride is essential for a comfortable road trip. Check for signs of uneven tire wear, vibrations, or pulling to one side, as these could indicate issues with the suspension or wheel alignment. Address any problems before hitting the road. Pack an Emergency Kit Prepare for unexpected situations by packing an emergency kit that includes: Jumper cables Spare tire, jack, and lug wrench Flashlight with extra batteries Basic tools (screwdrivers, pliers) First aid kit Reflective triangles or flares Tire pressure gauge Verify Insurance and Documents Ensure your vehicle's insurance is up to date and pack all necessary documents, including: Driver's license Vehicle registration Insurance card Roadside assistance information Plan Your Route and Stops Plan your route in advance, considering rest stops, meals, and attractions along the way. Having a well-thought-out itinerary enhances the overall road trip experience. Address Issues Early Getting your vehicle road trip ready involves a combination of preventive maintenance, thorough inspections, and proper planning. By taking the time to address any potential issues and prepare for the unexpected, you'll not only ensure a safe and reliable journey but also set the stage for unforgettable adventures on the open road. Safe travels!

Contact Us

Fill out this form below and we'll contact you shortly
*Required Fields